How to Install our prepasted wallpaper?
1. Get ready
TOOLS NEEDED
- Partner in crime ;)
- Measuring tape
- Snap off blade cutter
- Level
- Water vaporizer or thick paint roller
- Smoothing brush or plastic smoother
- Drop cloth or plastic sheet
- Bucket of clean water
- Sponge
PREPARE YOUR WALL
- Your wall needs to be smooth, clean and dust free.
- Patch or sand any damaged areas of the wall (sharp edges might pierce or tear the paper)
- Take off any electrical outlet
- For best results, surface must be a solid surface painted in light colour or primed the same way as if you would normally paint it.
- If your wall is freshly painted, wait a minimum of 1 week for the paint to dry completely. Else in may lead to air bubbles at the contact of humidity and poor adhesion on the wall.
PREPARE YOUR WALLPAPER
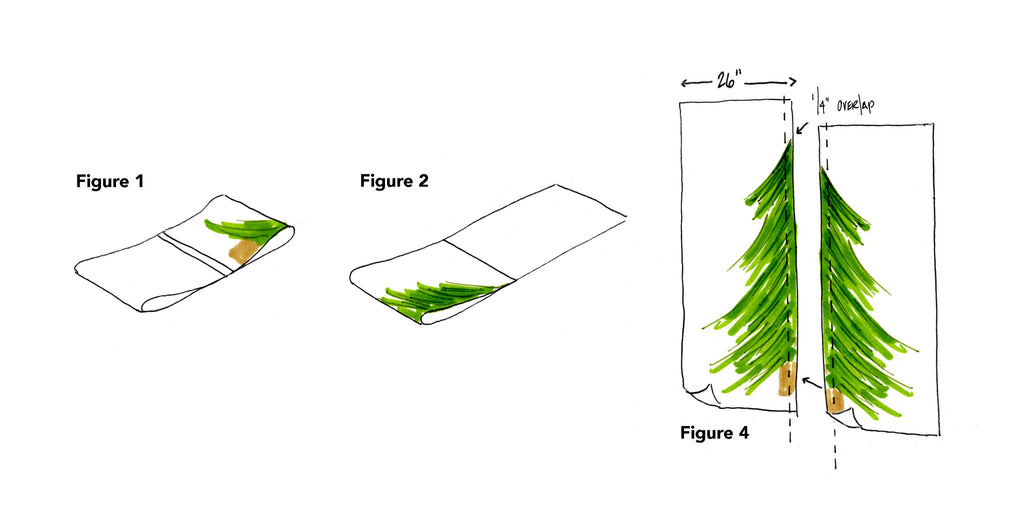
- Start by measuring the height of your wall. Installation goes from left to right. Panel #1 being the first on the left.
- Unroll and cut your first panel from the roll at least 2" at 4" longer that what you need to horizontally. Often, the panels are pre-cut in our Atelier. In this case, the bottom of each panel has a white margin and the top of the panel as no margin.
2. Start Hanging

- Place the panel face down on a plastic and generously vaporize water or apply water with a thick paint roller.
- Fold the panel glue over glue (fig 1). Wait for 3 to 5 minutes to activate the glue (called booking).
- Unfold the panel (fig 2) and apply it to the wall vertically levelled and remove the air bubbles and water using a smoothing brush. Keep in mind that some textures have an orientation to respect.
- Repeat until done.
- Trim excess paper along the ceiling and baseboard with a sharp snap off blade knife. If necessary, re-mist the areas that are dried off. Clean with clean water and a sponge.

* (Fig 3) Only for texture wallpaper: Often, there is a direction for the wallpaper to look realistic. Always keep the up side up. Up is written at the start of each roll. Each panel must be installed butt joint.
* (Fig 4) Only for photography wallpaper: Follow the number panel and overlap 1/4" inch
3. Enjoy your new wall
- High five partner in crime, you did it!
- Make yourself a drink
- Sit down and enjoy your room metamorphosis
- Take a picture and go social #wynil
Cheers ! Our pleasure !! Share your excitement !!!